Indie Designer Oct 2022 Blog Hop


THIS FREEBIE IS NOW AVAILABLE WITH
PURCHASE OF THE DIGITAL KIT!
See below for the link.


Welcome again! It’s an honor to be part of another blog hop with these wonderful ladies. 

Here is my addition! I loved playing with this great autumn palette.


Don’t forget to check out the matching digital scrapbooking kit while you are getting my freebie!


Your next stop is J. Conlon and Sons

Check out my new October Month by Month Pocket Card and Elements kits!!


AND THIS WEEKEND GET 25% OFF MY ENTIRE SHOP


July PixelScrapper Blog Train!

THIS KIT IS NOW AVAILABLE FOR SALE IN MY SHOP. Thank you all so much for an amazing blog hop month.


Hi all! I’m so excited to be participating in another PixelScrapper blog train! I loved this color palette for the beach. You can find the coordinating card kit in my shop (see below). Don’t forget to check out the blog train in the forum at PixelScrapper (digitalscrapbook.com)

You can get the coordinating pocket card kit in my shop!!


iNSD 2022 Indie Designers Blog Hop


***THIS BLOG HOP IS NOW CLOSED. YOU CAN CHECK ON THE LINKS BELOW TO SEE IF THE DESIGNERS STILL HAVE THIER FREEBIES AVAILABLE. SOME MAY NOT. THANK YOU FOR A GREAT 2022 INSD WEEKEND.


What an honor to unite with this amazing group of independent digital scrapbook designers to put on this blog hop for you… our favorite customers! The reason behind our successes and motivation. This is a big thank you for shopping small, for being excited when we release something new, for sharing your pages and your lives with us.

Who are we? A collective of digital scrapbooking kit/template designers who run our own businesses!! We love independence of our own stores but have come together to collaborate, support and learn from each other, and share with you all.

If you are an independent digital scrapbooking designer and want to join us check out the new Facebook group Independent Digital Scrapbook Designers started by Jennifer Conlon. It’s starting off strong and we would love your input and questions. Look for more from us in the future!!

If you have never done a blog hop here’s the deal. You can download my kit below first and then follow the link to the next blog, download that kit, then follow the link to the next blog, etc. Feel free to leave a comment on each blog! We love your feedback (and love your appreciation!) If you get lost along the way stop back here and pick up where you left off.

Here is the list of our contributors, including the names of the link to their blog, and their Instagram accounts! Come back here if you get lost along the way.

  1. Meagan Johnson | The PracticalScrapper | @thepracticalscrapper |
  2. Sally Wilson | Wilson Wilson | @wilsonwilsonorg)
  3. Connection Keeping | @connectionkeeping
  4. Sean Eyring | Taking Scrapbooks Digital | @projectlifeappdude
  5. Kelly Sill | Pixels to Pages | @pixelstopages
  6. Kim Hurst | Paper Crush Design | @kh_papercrush
  7. Jessica Dunn | Curio Pantry
  8. Jennifer Conlon | J Conlon & Sons | @jconlonandsons
  9. Karen Busby | BuzzBeeScraps | @BuzzBeeScraps
  10. Megan Scott | MegScottStudio | @MegScottStudio
  11. Laura Dulle | Digital Scrapbooking & Photography by Laura Dulle
  12. Gina | Weeds & Wildflowers Supply Co | @everydaylifeshoppe


Don’t forget you can save 15% on all the kits in my shop this 
Friday through Sunday!! No code necessary.

Happy scrapping everyone!

April Pixelscrapper Blog Train


THIS KIT IS NOW AVAILABLE FOR PURCHASE IN MY SHOP!!

Hi all! I’m so excited to be participating in my first PixelScrapper blog train!! 

If you have never checked out PixelScrapper before I highly recommend it. You can join for free and download five free items a day. Join for a nominal monthly fee to download even more!! It’s the best digital scrapbooking deal on the Internet. They have everything from flowers to twine to patterns to pocket cards in all the themes/colors/styles. 


Don’t forget to tag me @thepracticalscrapper if you use this kit and post your page on social media! I love to see how my cards are used.


2 years of THEPRACTICALSCRAPPER !

In April 2020, beginning of the worldwide pandemic, my brain was whirling with so many thoughts. The only calming process I found was creating!! My 6 years experience with Project Life app pages and playing with the Over app (now Studio by GoDaddy) wasn’t enough, however. I started exploring the idea of creating my own pocket card kits. My first was Covid kit to record my thoughts and our families journey through the lock-down. I decided to offer it for free to my friends and followers. Little did I know it would totally take off!! I found the creating more rewarding than I thought. It was so satisfying to see people like, download and post pages made with my designs. The designs were very simple (and I would design the kit very differently now) but I was hooked!! 

Two years later, a very active shop opened, several collaborations, and another smaller shop, and I’m still turning kits out…now with my own, more sophisticated style. I’m still learning SO MUCH. I’ve branched into full digital kits and print kits for hybrid scrapbooking but my staple is still digital pocket card kits for the Project Life scrappers.  

Check out a few of my past kits and notice the progression in style. I’m SO SO GRATEFUL for my customers who stuck (and stick) by me while I develop, experiment, create, and play!


I still have ALOT to learn but I’m just so giddy to be here…with all of you!!

Floating Photos in the Project Life App

Hey Project Life Appers!! I am here with a quick little tutorial you could chew on while I make my Over videos.  I love this little trick that allows you to add larger frames around pictures in a pocket so the look like they are floating. Let’s just dive in (pun intended!)
Here is my sample page:
Upper right pocket:


Design I with the picture in the center and the background color from the Hopscotch kit. Export thrn brought back into app with a 12x12 collage.


Add two Polaroid dingbats (KG Flavors and Frames 3) to frame the picture. One white on top, the other light gray. The gray creates a shadow under the white Polaroid. Export it again.


Add it to the desired pocket in your working page, zoom in, and add free form text, etc. I used the washi tape dingbat from the KG Flavors & Frames 3. The teal blue from Hopscotch has a transparent look (iPhone only).


Lower left pocket:


I started in Squared Away 9. Added my three pictures stacked on top of each other with  Just Add Color Photo Overlays. Then I selected my background color from the Hopscotch colors and exported (again 😉).


Then I opened up the collage section and chose 4x6C. On the left I added the striped card from the Hopscotch Kit and on the right I added the page with the three pictures and zoomed in slightly. On the left I added a scallop edge dingbat from KG Flavors and Frames Five. Then I exported and added it to the lower left pocket of my working page.


Voila!!!!!! Now go back to your camera roll and delete all those exported pages.


AAANNNDDDD...cause I can’t help but share this. You can also rotate that floating picture with PicTapGo!!


When you bring your exported picture back into your working page, select the edit button then open PicTapGo. Press on the crop tool.


Then select the rotate tool.


Now slide the rotation to your desired angle. You don’t need much and keep in mind that when it rotates it will also zoom in on your photo slightly.


Now hit “apply” in the upper right. Then “go” in the upper right and you are back to your page with your glorious, oh-so-fancy, floating AND tilted photo. Wowzers!!

My Counterfeit Kit Pages for March

I LOVED my kit this month!! So much so that I am not going to stop until it’s all used up. 
My little girls book is getting so full. 

March Counterfeit Kit Challenge!

Hey scrappy friends. I couldn’t let the month pass without making my kit for the Counterfeit Kit Challenge. Blue Skies and Butterflies is the name of the inspiration kit and those are two of my favorite things. I decided to make two mini kits this month and my goal is to make four pages and a couple cards. Maybe I’ll sneak in a TN layout too!

My first kit is more floral and spring inspired. I love all the colors in this kit and the little woodland animals.


The second is all about butterflies!! I dug out my butterfly punches and my WeRMemory Keepers frame punch. 


I can’t wait to dive in!! I will definitely be pulling from my 100s of gorgeous pictures of my sweet baby girl.

Counterfeit Kit Challenge Kit Take Two

I totally bashed through my first kit!!! I am so happy that I was able to get so much done. Since there are still 15 days left in the month and I just can’t imagine not having my own kit I made another one. This kit isn’t so much a replica of the Felicity Jane as much as an opportunity to create a kit with a couple of my favorite papers as a base. 

A while back I bought a 12x12 book of Jen Hadfield’s My Bright Life line by Pebbles. I ended up only really liking a few of the patterns. I like them so much, however, that I have wanted a build a kit out of them with supporting patterns so I could use them to their fullest. I really have a thing for matchy-matchy and having lots of pattern options. I have tried to fight it but to no avail! 


I really want to make a few greeting cards and some more pages for my baby girl. I love really colorful florals and birds so I am super excited to dive in. 

Full kit includes three letter sticker options, three ribbons, and the ephemera pack from My Bright Life, three multicolor papers with seven monochromatic patterns. 

Embellishments:

Just the paper:


I can’t wait to share what I make with this mini kit!! I hope I can use it up like I did the last one.

FOUR more projects with my Counterfeit Kit!

Hey CKC community!! This has been a very productive month in my crafting room this far. Thanks to my kit I have been able to make great head way on a few different books. For my baby girl I completed these two layouts:


The first layout, which still needs a title, is from a Scrapbook Generation sketch. I just love there sketches and kits so much. (I think I’ve maybe mentioned that 3 or 18 times!!) It also required lots of fussy cutting...not my favorite task but definitely worth it.

The second page is just too sweet for words! Notice those tickets I forged at the beginning of the month?!  I loved putting both of these pages together for her baby album.

A couple other pages are for the challenge to scrapbook something new in honor of the new year. I made the title page to my 6x8 pocket photo journal.  I love the shaker pocket! They are so easy. Fill them up then stitch across the top. 


More tickets on the following page which I made for my 2013 family album:


I will be making more tickets in the future! Such a simple, quick task but such a great impact.

Well gals!! I totally bashed the heck out of my kit!! Either I didn’t make it big enough or I’ve done too many projects?! Either way I can safely tuck those scraps into my “for my nieces” bin. 

STAY TUNED!! I MADE ANOTHER MINI KIT TO FINISH OUT THE MONTH!! I am super excited about it. I will post about it very soon. 

My 2019 Family Album Plan


So I am processing my 2018 pages and am completely swamped!! They are all done but there are just SOOOOO MANY!!! Like three times more than I normally make. Lots of reasons explain the increase. A very cute baby girl plays a big part then there were all the updates in the Project Life app that had me experimenting way more than I normally do. As fun as its all been, I am facing a printing cost that is exorbitant!! I have a few solutions for that issue but it has motivated me to reign in my 2019 Family Album big time. 

In the past I have kept my album to about 120 page along with extra pages for my kids’ books and separate books for our travels. For 2019 I actually wrote out a plan to try to keep it to 120!! I never really plan anything so this is huge. 

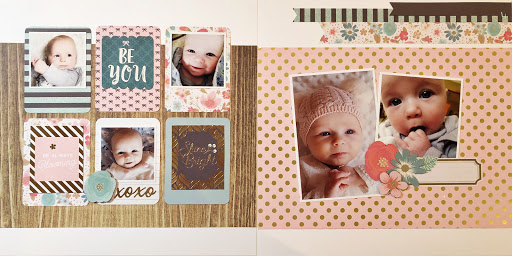
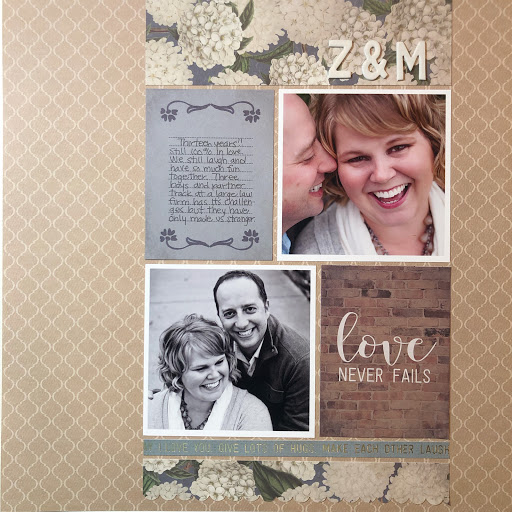
First, I decided NOT to continue with Project 52 this year. 2018 was the first year I tried it and was able to complete the whole year but, by the end, I was felt like I was forcing myself to take pictures to fill space. I just wasn’t telling the story of our everyday life like I wanted too. Too much minutea, not enough substance! I would rather gather pictures across weeks that focus on relationships and patterns and then make overview pages about those things. Francie and Jasper, for instance, developed a very sweet connection over the year. I would have preferred to take up space in my family book with a layout of their relationship instead of pictures of them together scattered across my weekly pages. Does that make sense? So it’s back to an everyday layout once a month (now known as Project 12) which is what I have been doing since 2005. Why mess around with a good thing?! 

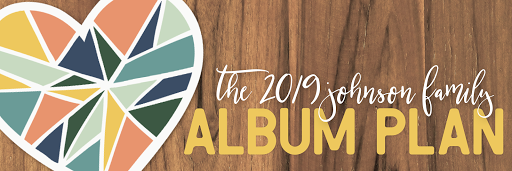
So...without further ado, here is my plan!

2019 Family Album Plan:

* ONLY 120 pages!! Two 60 page 10x10 hardbound books printed through the Project Life app. 

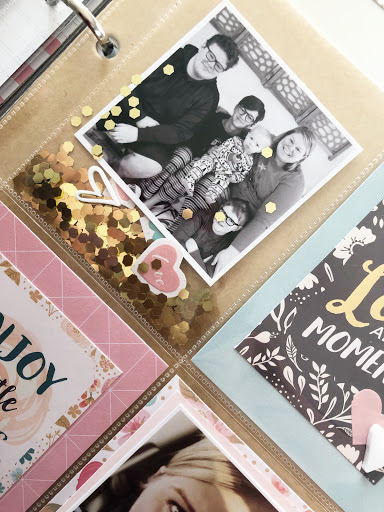
* Drop Shadow on with light gray background throughout

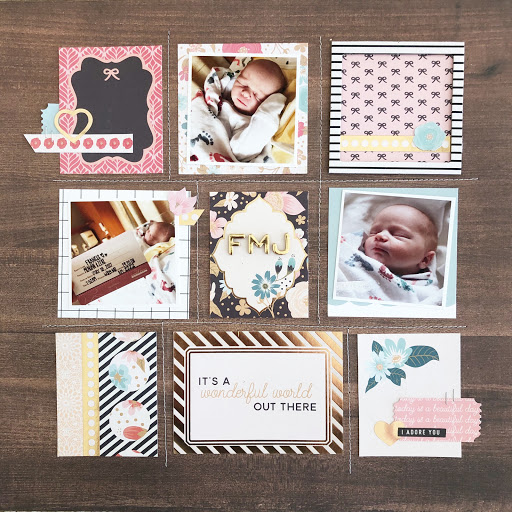
* Pocket style with added embellishments in Over. Stick to in-app cards as much as possible for simplicity.

* Occasional large picture page throughout 

* Project 12 for Everyday Pictures

* Make a separate books for trips to Grammas’ houses, Iowa, vacations with a highlight layout in family book

* Try to have at least 4 layouts dedicated to family relationships and how we show love to one another

* Add pages to 2019 Family Album folder, PL book and export to Dropbox as I go
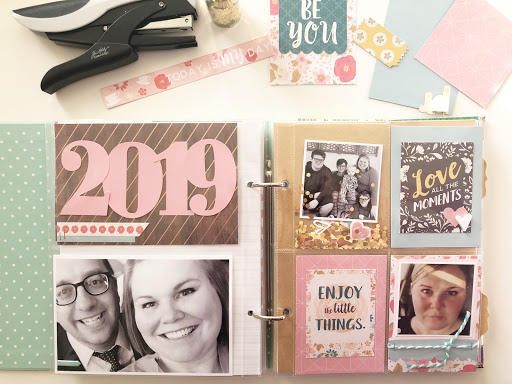
* Title Page (1)

* January: Project 12, Isaac’s play, Luke’s Nordic, anniversary, Isaac’s birthday (8)

* February: Project 12, Valentine’s Day, Random Winter Fun Layout (sledding/snowmen/hotchocolate)(6)

* March: Project 12, Jasper’s birthday (4)

* April: Project 12, Easter Morning, Easter with Family, Zeke’s birthday (8)

* May: Project 12, Spring Concerts, Random Spring Fun Layout (flowers/playing in rain) (6)

* June: Project 12, End of School, LaCrosse overview (6)

* July: Project 12, July 4th Day, Fireworks, Francies birthday (8)

* August: Project 12, Random Summer Fun layout (pool, park, ice cream truck) (4)

* September: Project 12, Back to School (4)

* October: Project 12, Meagan’s birthday, Halloween, Cross Country (7)

* November: Project 12, Luke’s birthday, Thanksgiving with each family, Fall Fun Layout (fall foliage, playing in leaves) (10)

* December: Project 12, Family Parties, Christmas Eve, Christmas Day, New Years Eve, December Daily Fun Layout (shopping, gingerbread house, baking) (12)

* Last Page (1)

* Pages Planned: 79

* Event, Random Pages, Full Size Pictures, Relationship Pages allowed: 41

So! What do you think? Do you have a plan for your personal or family album 2019? Steal mine if you want to!!  If you need more guidance or motivation Becky Higgins newest self-paced class would definitely be a great place to start! You can check it out here: https://classroom.beckyhiggins.com/courses/family-yearbook

I will keep you posted on my progress! Happy memory keeping in 2019!


Pages #1 & # 2 for my CKC 

Hey all! Here are a couple pages I have made so far. I am working on my ticket page still but I love these!

The first page is based on a Scrapbook Generation sketch. I love their sketches so so much and have been using them for years. I used my 1.5” circle punch and added stickers from the American Crafts Maggie Holmes Sticker book. I love those designer sticker books from American Crafts. They really come in handy!


My second page came together really quickly. I love it! The papers are perfect for our family pictures in 2013 (which is the year I am working on right now).


Fun huh?! I really like how my kit helps me focus.

A forgery for my Counterfeit Kit!

So I am sneaking in a quick Forgery on the Fourth. I wasn’t asked to do so as the guest designer but, on a whim, I thought of this super cute way to copy an element of our Counterfeit Kit. In the Felicity Jane kit there are super cute labels in the shape of tickets. 

I have a random selection of tickets in my stash but none that are the right color so I had to get a little creative. I still have a few decorative edge scissors and one set is a stamp edge. Stamps have that perforated edge just like old school tickets from a ticket reel. I cut my paper to 1” x 2” pieces and trimmed the edges with the scissors then took a hole punch about a quarter of the way to the corners. 

Pretty easy and the end result...


pretty cute huh!! I am working on a page that incorporates the tickets. I will post it soon!

Can’t wait to see what the master forgers have to offer!!